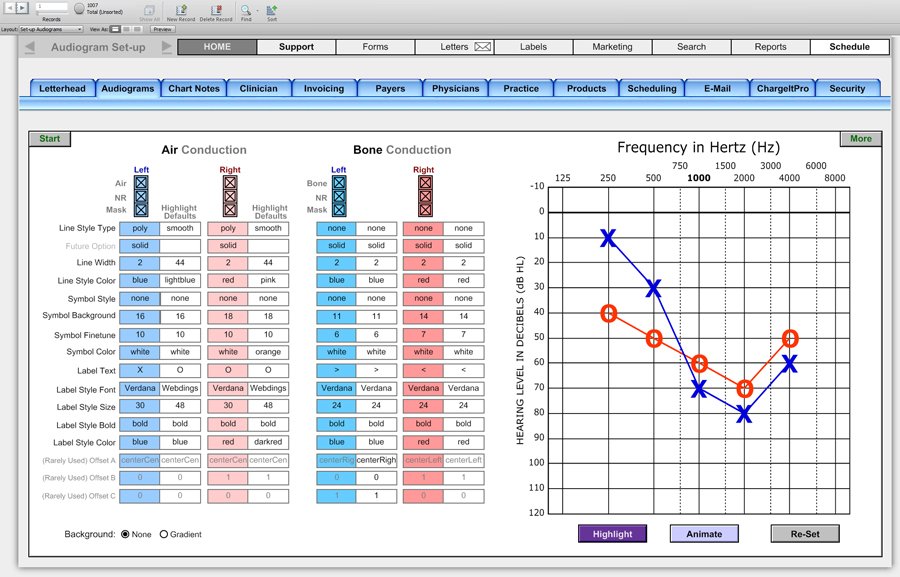
Audiogram Set-up Symbols
This screen can either be somewhat intimidating are actually quite a bit of fun. Well, you'll generally use the standard ANSI symbols for your audiograms, you may periodically want to display your audiograms in a manner that makes more sense to the patient. For example, you can choose from thousands of different symbols that represent both the right and left ears. By default, we'd left in a font and symbol that displays the right and left air conduction symbols as red and blue ears. Of course, you can change those symbols based upon your particular needs.
You can also change the color of the lines that connect symbols. Additionally, you can change the size of those lines so that they are very narrow or extremely wide. If you use a light blue, for example, you can envelop or completely highlight the slope, creating a much stronger visual. The point is that you are in control of how your audiograms look. Experiment with the variety of choices that are available to you to find a teaching tool that fits your style.

The highlight button temporarily changes the audiogram to modify, display, using your preferences. The animate button toggles back and forth between the standard audiogram and the highlighted version. The reset button changes the audiogram back to the ANSI format.
The screen also allows you to display the audiogram, with or without a gradient. Additionally, you can hide or show air and bone conduction scores for either the right, left or both ears. You can also choose whether to show no response symbols or masking symbols.
